The standard education parents get about how much their children should eat goes something like this: "They will eat until they're full." So, based on that I kept giving my oldest food as long as she kept eating. After her third or fourth helping I started to wonder if she'd ever get full! She has also consistently been in the 99th percentile for weight (and, fortunately the 95-98th percentile for height) so I've had to re-evaluate the standard education because my daughter is not standard. She's a bottomless pit!
All day long she asks, "Can I have a snack?" I seriously regret ever using the word snack in the first place. Although I'm sure something else would have taken its place. So I am constantly trying to create ways to lengthen snack time and choose snacks that are filling but lower in calories. Here are some solutions that have worked for us and are quite fun, too!
To lengthen snack time I look for ways to prolong the eating. This gives her tummy a chance to tell her brain she's full. I keep anything that has small sections, like an egg carton. I cut it down so it only has 4 or 6 sections. Then I put a couple of each snack into a compartment. For example, I put 2-3 grapes in one, 2 pretzels in another, her chewable vitamins in a third, 3-4 dried blueberries in the fourth. She gets really excited watching me put the snack tray together. Then we sit down at the table and visit as she eats. I ask her questions and help her remember to swallow before talking. We talk about what she'll choose next, what she likes most, what color the snacks are, how many are in each, how many different snacks, etc.
Sammi's all-time favorite, though, is Easter egg hunting. The Easter eggs from last year have been a regular toy around our house. I fill each egg with just 2 of a snack. Then I hide the eggs around the room, give Sammi a basket and let her find them. If I really want to drag it out, I only let her eat one egg then we hide them all again. We continue hiding/finding until either she's bored or the eggs are all empty. While this is a ton more work and I don't always feel like it, it has been a great way to slow down her eating and get her moving in the meantime.
Here's to fun, healthy snack times everywhere!
Itty-Bitty Bookworm


Showing posts with label Physical Friday. Show all posts
Showing posts with label Physical Friday. Show all posts
Friday, August 21, 2009
Friday, August 14, 2009
Physical Friday: Standing Before Walking
 The photo-elusive (took 23 pics to get this one!) Elli has picked up a new trick this week. She has started standing up from a squatted position. Last week she stood up holding on to me and then let go for a few milliseconds, but this week it's entirely about balance!
The first time she stood for a long time she happened to have a pair of child-safety scissors in her hand. I know, I know, I'll have to review my own guidelines for teaching children how to use scissors. I was so excited to see how long she could stand without losing her balance, but I was also worried about hose scissors. In the end I didn't disturb her and just waited for her to sit again before I promptly removed the scissors from her hand. I wasn't about to run for the camera at that point!
This morning we made a stop at the Harrogate City Hall (I'll explain that in a future post) and the two gals that were there thought Elli was just so cute. So to get their attention, Sammi started telling them how Elli is learning to stand. She did a perfect re-enactment that made us all smile. Then Elli caught wind of what was going on so she promptly joined the attention seeking and started to stand up. She did it great the first time. The gals oohed and ahed which encouraged Elli to do it again. She had such a grand time that she kept losing her balance as she giggled and hid her head in the floor. It was performance at its best!
While this is probably the norm (to stand before walking) it's a new development path in this house. When Sammi was about 14 months she started walking. I remember starting to wonder if Sammi would really ever walk. She seemed so old and so heavy! But she did it. The first time we left her with a sitter, no less. But she propelled herself by momentum. If she lost her balance or ran out of steam, she fell right over. She didn't learn how to just stand until she'd been walking for well over a week. However children do it and whenever they decide it's time, they'll get it eventually!
Friday, July 31, 2009
Physical Friday:
 The GNO Party this week on Twitter was fantastic. I love living in Eastern time because the girls are sound asleep by the time the party starts. Mom It Forward knows how to throw a party! The topic was Affordable Fun 101: Kids Crafts and Ideas. This was right up my alley so I was honored to be a part of the panel.
A few ideas that received a lot of attention are things we do around here so I thought I'd share. Today's idea involves butcher paper, your child's body and crayons/markers/colored pencils. Easy peasy, right?
Now to get down to business. Have your child lie down on the butcher paper. Then trace around your child with a crayon/marker/colored pencil. After you've traced the whole body, have the child color in clothes, hair, facial features, or Sammi's favorite, finger and toe nails.
Variations/Extensions
Several party-goers offered great ideas on how they adapted this concept with their little ones.
- The original idea was brought up by Workingmomma247: "I have had my 5yr old lay down on butcher paper to outline his body and he colored the rest."
- From Momof3boys3702 comes this extension: "We are doing Biology this year and I was thinking of doing that and having him draw his organs in correctly."
- And Brunette01 came up with this variation with her daughter: "I helped my DD do cut-outs of everyone in the family to add to her bedroom wall. All her idea. It's awesome :)"
- We had Sammi trace around Elli and around Daddy. Daddy was a lot more cooperative :)
 As you can see, Sammi is turning into a lefty! This fun idea also gives little ones time to practice fine motor skills. Sammi is learning to control her hand better and the pencil as she traces around body parts. Going in between fingers is still hard for her, but when she's done, you can tell which body part she traced! She now loves to trace her own hand. And then "paint" the fingernails.
 And to continue, from yesterday, with things to remember about three year olds (and probably all children): Never attempt to do a project, even if it's fun, between bath time and bedtime. Especially if you want pictures that are halfway cute. It's not a pretty picture. I don't recommend doing it!
Friday, July 17, 2009
Physical Friday: Cake Decorating with USO Conversation Hearts from Sweethearts
 I think I mentioned that Brent joined the Air Force and was at Officer Training for a month before we moved to TN. Yeah, I'm pretty sure I did: here, here and here. With that at the front of my thoughts and experiences, I jumped at the news that Sweethearts (my absolute FAVORITE conversation hearts) was releasing a new line called Red, White and You to honor the military and celebrate America's patriotism.
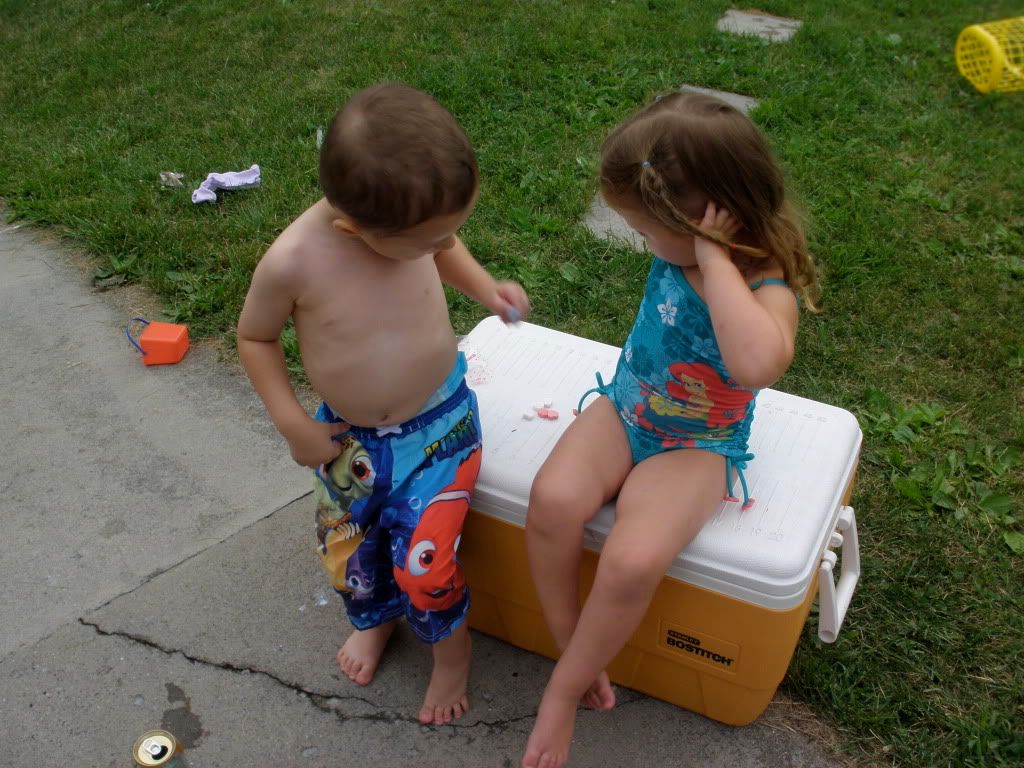 The hearts are red, white and blue with patriotic sayings such as "Miss You," "Proud of You," and "Home Safe." The blue ones are blueberry flavored, which I really enjoyed. We had lots of fun trying to decide what to do with our candy hearts. We shared some of them with friends at the 4th of July cookout. A few of the other medical school students here at LMU-DCOM are also in the Air Force and enjoyed the hearts.
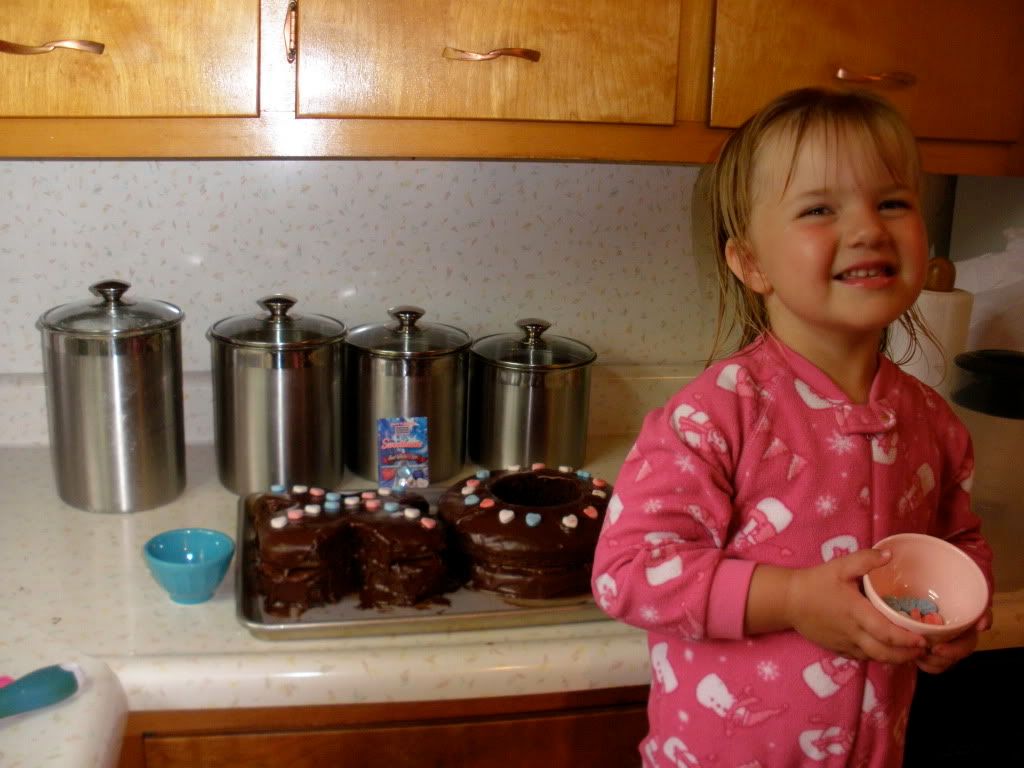 In the end, Sammi and I decided to make and decorate a cake. We made two cakes, an "X" and an "O" to show hugs and kisses for Daddy. Placing the small candy hearts on the cake was good practice for her growing fine motor skills. She was able to place all of the hearts "correctly" the first time, meaning she was pleased with where they went and how it looked. It's fun to see her developing into such a capable child. I hardly had to oversee her in this project. When I get too involved, she's quick to remind me, "I can do it myself, Mommy!" Or if I'm really intruding, "I can do it myself, Amber!"
She was also very careful to place the hearts so the words were showing every single time. I didn't even ask her to make that distinction. She's definitely showing literacy awareness.
The United Service Organizations (USO) offers a great little packet of craft ideas using the Red, White and You candies. You can download the packet here. Also, through the rest of this month you can donate to the USO to sponsor a care package sent to a deployed service man or woman which will include the Red, White and You candies.
Friday, June 5, 2009
Physical Friday: Crawling
 First an explanation and apology: So Brent's been gone about 2 weeks now at training for the Air Force. Before he left I thought it would be great to use the time in the evening after the girls were in bed to blog, catch up on reading and get the house work done. Maybe even some of my sewing projects, too! That was so naive! The truth, I've been completely exhausted and when I sit down, I have the hardest time getting back up again. I've completely lost my stamina and I feel like my brain shuts off at 8:10 when the girls are finally asleep. Ugh. It's been a lot harder than I thought it would be. I apologize for not posting more regularly the last couple of weeks. My goal is to be better! But, we're also moving in three weeks so I'm working on packing up the house.
Just as not all children crawl at the same age, not all children crawl the same way! The standard image of crawling is the baby on hands and knees with belly lifted off the ground. Other forms of crawling include the army crawl where the baby sprawls on the floor and uses arm strength to pull his body along; the scoot where the baby is in a sitting position and scoots her body to her feet then extends the feet out and scoots the body again; the hand-foot crawl where the baby moves along on hands and feet instead of knees. Most babies perfect one or more of these forms of movement before learning to walk.
It's vitally important to note, though, that crawling is NOT a standard developmental milestone. It's perfectly acceptable for babies to bypass the standard image of crawling all together and get right to walking. I have heard tell that babies who don't crawl but go straight to walking are poor readers. From the academic research I found, that information is not supported. I did find some rather interesting stuff, though!
Crawling is a complex system of movement. Babies must learn and master a long list of skills before finally figuring out how to put them all together to crawl. Obviously babies must learn how to hold their head up and how to get up on their hands and knees. But they also must learn how to rock back and forth while on their hands and knees. Finally, they need to learn how to move opposite arms and legs simultaneously, i.e., right arm out with left leg back. This skill is learned and improved as babies learn to reach for objects and begin to realize they can move their whole body in order to reach a desired object.
Once babies learn to sit, they pick up on clues about depth perception in their surrounding environment. When children have been sitting alone for a while, they are able to make good decisions about how far to reach for objects and whether they should reach for objects across an open space. When babies become crawlers, they have to relearn the appropriate clues to depth at this new level. That's why new or inexperienced crawlers will crawl right off the edge of the bed or stairs after an object (or an older sister like Elli did earlier this week!) With practice, though, babies learn what's safe and what's not. The next time Elli approached the stairs she backed up, sat up and looked at me for help! They learn so fast.
Friday, May 29, 2009
Physical Friday: Benefits of Rocking
 The opening topic of a junior-level university lecture I attended was "How to Calm a Crying Baby." I chuckled as I recalled all the times my babies have fussed and I'd tried everything I could think of to calm them down. My babies love to be swaddled and to be rocked. Of course both of those were on the list along with diaper changes, feedings, singing, pacifiers, and changing positions of the baby.
I was beginning to wonder if this lecture would be worth my time when the instructor went off on a tangent about rocking. He shared some pretty interesting information that I thought I'd pass along. First, mothers rock their infants at the same rate of speed at which they walk. Since rocking is a familiar motion to babies from their in utero experience, it only makes sense that they would be most calmed by being rocked at the same speed at which their mothers walk. What I find more fascinating is that mothers unknowingly rock their babies as fast (or as slowly) as they walk. And yet, that is precisely the most calming speed for their babies. Which also explains why mothers seem to have "a knack" for calming their babies faster than anyone else. I can't tell you how many times I've refrained from offering to take a crying baby. I'm pretty good with my own kids, usually, but that doesn't mean I'm a super-comforter!
The second tangent about rocking showed how rocking is important and necessary for baby's development. The rocking motion helps a baby organize the vestibular system which controls equilibrium, or balance. As a baby is rocked, the fluids in the inner ear move around which triggers the vestibular system to action. While the baby is calmed and rocked to sleep, this system is hard at work practicing communicating to the brain all the information gathered about the baby's balance. I love this because all the times I've just sat and rocked my babies, ignoring chores, ringing phones, and errands, are completely justified because I was promoting my babies' development. The next time the current baby insists I drop everything and rock her, I will remind myself it's as important as tummy time to help her development.
I recently learned that children between 3 1/2 and 4 years of age go through a major physical development stage which leaves them awkward and clumsy until they get a handle on their new skills by about age 4. I was thinking about that in relation to rocking. It leads me to believe that rocking continues to be a necessary part of how we interact with our little ones. And it's not always the calm, rocking-to-sleep motion; it doesn't always happen in a rocking chair. Often Sammi and I "rock" when we dance together or she bounces on my leg or a variety of other times when we are physically close and moving together.
Friday, May 22, 2009
Physical Friday: Blowing Bubbles
I love the warm weather and the chance to get outside and play! One of Sammi's favorite outside games from last summer is blowing bubbles. When we first got bubbles, she was content to let us blow them and she'd chase them down and pop them. But very quickly she wanted to be in charge of the bubbles! She worked so hard one day until she was able to blow bubbles out of the bubble wand. Once the cold weather came back, we found a way to bring the bubbles indoors with us. We have a medium-sized rug in the living room that Sammi can blow bubbles on. As soon as she steps off the rug, though, we put the bubbles away. It only took her a few times of not watching where she was going that she figured out how to stay on the rug so she could blow her bubbles.
It takes an awful lot of coordination to actually blow a bubble, successfully! First, little ones need to grasp the wand, put it in the bubble bottle and take it out. That's fairly easy for a child who's 18 months or older. Next they have to figure out how to hold the wand close to their mouth without touching their mouth. This was THE hardest part for Sammi. I kept a damp washcloth with us to wipe her mouth off periodically so she wouldn't have the icky soap flavor on her lips. Finally little ones need to control the shape of their mouth at the same time they are blowing air out. This took lots of modeling for Sammi to get the hang of. It's taken her months to be able to blow air with any force.
With how difficult it is to successfully blow a bubble, I'm surprised that anyone would stick with it! But, the activity itself is so rewarding for little ones that they keep going despite the setbacks. This is learning at it's best!
If that wasn't enough to get you outside blowing bubbles with your little ones, here's an interesting connection between blowing bubbles and language development: In 2006 researchers reported that children who could blow bubbles, lick their lips and pretend tend to have an easier time learning language! Read more about the study here and here. Also, check out these 10 ways to use bubbles for language development.
Have you entered the giveaway for tickets to the Discovery Gateway Children's Museum? Click here to learn more and enter! Giveaway ends May 26.
Friday, May 8, 2009
Physical Friday: Tummy Time
 The buzz word around babies is always tummy time! "Make sure they get their tummy time!" "Are you putting your baby on her tummy?" "How much time does your baby spend on her tummy?" Everyone is so concerned with tummy time! and for good reason, too.
Here's the deal: Babies are born with big heads and weak little muscles. It takes a lot of work to build up the strength in their necks to hold those big heads up. That's why they sleep all the time! They're so tired from working on strengthening those muscles.
 Tummy time provides the perfect opportunity to help baby develop neck and head strength. My babies, though, are NOT fans of tummy time. Even now, at 8 months, when Elli rolls to her tummy she fusses until we get her sitting up again. But, there are lots of ways to make tummy time work. You can start by laying your baby across your lap on his tummy. Another way to be more involved in tummy time is to lay on your back or recline and put your baby on your chest so you can look at each other. Since babies love faces, this is a great way to make tummy time interesting.
As your little one gets older and stronger, move tummy time to the floor. At first you want to aim for a combined total of 5 minutes a day of tummy time. Once your baby can do 5 minutes in one session, gradually increase the number of times you do tummy time to several a day. Keep tummy time interesting by getting down on your tummy and talking to your baby. You can also put a toy in front of baby to encourage her to keep her head up.
Eventually little ones learn to hold their chest up off the floor with their arms. Then they learn to move their arms to reach for toys. All these aspects of tummy time help babies get stronger and more coordinated which leads to other milestones like crawling and walking.
How does your little one react to tummy time?
Friday, May 1, 2009
Physical Friday: Handedness
 I love the term handedness. It conjures all sorts of ideas in my head: to be with a hand; to have things handed to you; the image of lefties writing; cute, chubby baby hands handling objects.
Handedness is defined as the preference for the use of one hand over the other. Here are some interesting facts about handedness in little ones:
- for infants under 1, only about 30-50 % show a preference for the right hand in reaching for objects
- for infants under 1, 10-30 % show a preference for the left hand
- for infants under 1, the remaining show no preference
- the preferred hand may change as they get older
- more permanent hand preferences in infants don't occur until the second year of life
One thing we do that unknowingly influences handedness in our little ones is handing toys or other objects to a specific side of their body (always handing a spoon to the right hand). We can remove this influence (it's not crucial to, but just for fun to observe their handedness) is to always hand objects to the middle of the body. When Sammi started preferring her right hand, I got in the habit of handing everything to the middle so she could choose and because I didn't know what hand it would be this time. I think this also shows acceptance of whatever hand they use, especially if it is a different hand from you.
Does your little one have a hand preference?
Cute, chubby baby hands picture courtesy of Lottie Lou Design.
Friday, April 24, 2009
Physical Friday: Earth Day Craft

 This Egg Carton Ladybug comes from Enchanted Learning. After gathering the supplies to make the ladybug, I realized I also had the colors to make a bumble bee. Then we truly claimed the craft as our own by completing our set of egg carton creatures by making a caterpillar!
 To make the bumble bee, we painted the carton yellow then added a black head and two black stripes. Then we poked two holes in the top, one for each wing. The wings are half a length of pipe cleaner looped and threaded through the hole. Then we bent the end over to hold it in place.
 It's hard to tell in the picture, but each section of the caterpillar is a different shade of blue-green. We twisted a blue and a green pipe cleaner together to make the antennae and then curled them around a pencil. My favorite is the pink tongue. I'm pretty sure caterpillars don't have tongues, but I added the tongue in memory of the Cooties

Friday, April 10, 2009
Physical Friday: Holding Objects
 One day you have a newborn who lays calmly in your arms, smiling contentedly as you go about your business. The next day, however, your baby has turned into an active, curious baby constantly looking for something to grab onto. This is one of my favorite transitions in early childhood because once babies realize they can control their environment, they begin to interact with the things around them.
Sometime between 3-4 months babies begin to show interest in objects other than faces. They look more intently at new objects discovering every detail. They may even begin to reach out toward objects. By 6 months babies usually have mastered holding and turning an object in their hand.
Here comes another of my favorite transitions: Babies then begin to realize they have two hands and can thus hold two objects. During this period I like to play my favorite game. Elli and I have entertained ourselves for quite some time with this engaging game.
I sit on the floor facing Elli with three blocks. I hand her a block; she grabs it in one hand. I hand her the second block; she grabs it in her other hand. I hand her the third block; she drops a block and grabs the third block in the now empty hand. I pick up the recently released block and offer it again. Elli again drops a block to grab the newly offered block. I pick up the discarded block and hand it to her again. She again drops a block and grabs the new block.
You get the picture. This goes on for a very long time! It's so cute to see how excited she is each time a "new" block is handed to her. She is so excited to grab it that she forgets completely about the block she already has in her hand.
If your baby is in this adorable stage, act quickly with this game. Sooner than you think babies wise up and attempt to hold all three blocks at once.
Friday, April 3, 2009
Physical Friday: Making Letters
 We've been having so much fun finding the S in Sammi's name everywhere! I decided she was ready to make one herself. One thing led to another and after a few days, we had her whole name! I wrote the letter with glue and she placed the objects on herself.
 We practiced all the letters' names as we made them. Then just as we were finishing up, m mom stopped by. Sammi loved showing off her letters to my mom along with naming them for her! It was fun to see her remember them all after such a short time. I was also very impressed that she "got" the double M in her name. Usually she ignores the repetition because she doesn't see it as necessary. She already said it once and correctly at that! Why should she have to repeat it? I think making two Ms helped her "get" it.
For materials we used whatever I had around the kitchen. The S is dry black beans. The A is green yarn. The pink M is harvest rice medley. The blue M is penne pasta. The I is Acini di pepe pasta that I tossed with red and yellow food coloring drops for a fancy variegated look. For the rice and Acini di pepe she scooped it up with a spoon and then shook it out over the glue (like you do with glitter) and then I helped shake the paper around so all the glue was covered up. She liked these ones the best. I think she felt so grown-up using the spoon.
What else would be good materials for making letters?
Friday, March 27, 2009
Physical Friday: Let's Get Baking!
Today we'll head into the kitchen and mix up a batch of cookies! This is my favorite chocolate chip cookie recipe ever. Whenever I talk about cooking with Sammi, I typically hear these responses: It takes so much longer to cook with kids helping; It is so much messier when the kids help; I don't know how my kids can help.
Here are some ideas to combat those potential setbacks:
 I have to credit my husband with this, but since we started cooking with Sammi, she can now crack an egg, open it and dump the egg into a bowl. To top it off, she rarely gets any egg shells in with the egg. I know that the only reason she can do that at 2 1/2 years is because we trusted her enough to let her try. I cleaned a lot of egg up off the floor, but now she has a lot of confidence in her abilities and loves to cook.
If this is your first experience letting your child cook with you, I caution you to not expect it to go perfectly. It may not even go smoothly! But, if you remember that it's play and the process is the activity, then it can be a lot of fun. Your kids will be so excited to do something they've never done before, especially something they see you do all the time.
Ultimate Chocolate Chip Cookies (from Crisco)
3/4 C (cup)Butter flavored Crisco shortening
1 1/4 C firmly packed light brown sugar
2 T (tablespoon) milk
1 T vanilla
1 egg
1 3/4 C all purpose flour
1 t (teaspoon) salt
3/4 t baking soda
1 C semi-sweet chocolate chips
1 C coarsely chopped pecans (optional)
 I'm also over at I Never Grew Up today sharing one of our favorite games. Come check it out!
Here are some ideas to combat those potential setbacks:
- Set aside extra time to bake. Think of this as any other play activity. Let it take as long as it takes!
 Plan for messes. Keep paper towels, washcloths, or sponges close at hand to quickly wipe up the messes. It's so much easier to clean up as you go so it's not so overwhelming when you're done.
- Making cooking a play activity takes a little extra prep, but it's worth it!
- Give your kids wiggle room. Let them practice pouring, scooping, stirring. You'll never know what they can do until you let them try.

 I have to credit my husband with this, but since we started cooking with Sammi, she can now crack an egg, open it and dump the egg into a bowl. To top it off, she rarely gets any egg shells in with the egg. I know that the only reason she can do that at 2 1/2 years is because we trusted her enough to let her try. I cleaned a lot of egg up off the floor, but now she has a lot of confidence in her abilities and loves to cook.
If this is your first experience letting your child cook with you, I caution you to not expect it to go perfectly. It may not even go smoothly! But, if you remember that it's play and the process is the activity, then it can be a lot of fun. Your kids will be so excited to do something they've never done before, especially something they see you do all the time.
Ultimate Chocolate Chip Cookies (from Crisco)
3/4 C (cup)Butter flavored Crisco shortening
1 1/4 C firmly packed light brown sugar
2 T (tablespoon) milk
1 T vanilla
1 egg
1 3/4 C all purpose flour
1 t (teaspoon) salt
3/4 t baking soda
1 C semi-sweet chocolate chips
1 C coarsely chopped pecans (optional)
- Heat oven to 375° F.
- Combine shortening, brown sugar, milk and vanilla in bowl. Mix until well blended.
- Beat egg into creamed mixture.
- Add flour, salt and baking soda. Mix into creamed mixture.
- Stir in chocolate chips and pecan pieces.
- Drop by the spoonful onto a cookie sheet. Bake 8-10 min. Remove from oven and let cool on cookie sheet 1-2 minutes. Remove cookies from baking sheet and place on cooling rack.
 I'm also over at I Never Grew Up today sharing one of our favorite games. Come check it out!
Friday, March 20, 2009
Physical Friday: Shape Sorters
 A shape sorter, to me, represents childhood. It's one of the earliest toys I remember playing with. I like them because they bring together cognitive development as well as motor development. It takes brain power to match the shape with its hole and it takes motor skills to actually put the shape through the hole.
Shape sorters help little ones work on gross and fine motor skills. Picking up the shape and moving it to the sorter requires gross motor skills to move the whole are. Then, once the shape is at its hole, your little one must then rotate and manipulate the shape to get it to fit just right through the hole. This takes fine motor skills.
I feel strongly that every little one should have access to a shape sorter! There are so many companies producing a variety or styles of shape sorters so you're bound to find soemthing in your budget! Check out these shape sorters
Wednesday, March 11, 2009
Saint Patrick's Day Streamers
 Along with the shamrock, the rainbow is a symbol of Saint Patrick's Day. The leprechauns are hiding at the end of the rainbow with their pots of gold. Instead of chasing rainbows or, worse, waiting for a rainbow to appear, we made our own rainbows at a recent playgroup. These rainbow streamers are a fun project for even the littlest ones. All you need is a small paper plate and the colors of the rainbow. You can use crepe paper, ribbon or even construction paper cut into strips.
Cut the center out of the paper plate. Cut the crepe paper, ribbon or construction paper strips into lengths ranging from 12-24 inches, whatever suits your supplies. Staple each color to the paper plate. We folded the ribbon over the inside edge of the plate and stapled through both layers of ribbon. Arrange the colors to match the rainbow. Remember Roy G. Biv? Red, Orange, Yellow, Green, Blue, Indigo, and Violet. We omitted blue and only used one purple color. Anything goes!
After we attached the rainbow to the plate, we turned on some music and danced around. You could also have a parade across the yard or down the street. Happy Saint Patrick's Day. We hope it's a lucky one for you.
 I'm posting this today instead of Friday because we are having our first guest post on Fitness Friday! We'll be hearing from 3boyzmom from Save Your Money Mama. I'm excited to hear what advice she gives on fitness and health. This is part of the Blog Swing for the Wii Mommies Twitter Party this Saturday. Check it out and register to win a Wii Fit from AceBeach.com
Friday, March 6, 2009
Physical Friday: Becoming a Toddler
 A most anticipated motor milestone is walking. We anxiously wait and wait for our little ones to start walking. And then we wish we hadn't wished so hard because that means child-proofing, chasing them when they try to escape, and so on.
Despite all that, I was so excited for Sammi to walk. Now she could follow me from room to room. She was much happier about keeping up with me, too. It was obvious, though, why newly walking children are called toddler! Her balance was inconsistent. Sometimes she could walk across the room and other times she fell over after just a few steps. Even when she was walking, she had the "characteristic gait of the child who has not fully mastered the skill of walking." That does nothing to explain how cute it is to see them waddle like a "duck out for a jog!"
It takes about 6 months from the first step to the coordinated smoothnes of an adult's walking motion. It takes 6 months of practice regardless of the age of the child at the first step! Balance appears to be the factor that affects the smoothness of a walker's motion. As a child practices and improves balance, steps become more symmetrical and there is less hesitation between steps.
Here's a video of Sammi's first full day of walking. What a riot!
The song is Animal Crackers in My Soup by Joanie Bartels'
Friday, February 27, 2009
Physical Friday: A Cut Above
 Consider your child holding a pair of scissors. What's your first thought: a necessary evil or the ultimate challenge?
Sammi loves scissors. She loves to cut. Just before she turned two she really became aware of scissors and wanted to hold them, cut with them, even walk with them (if I would have let her!) I didn't think she was old enough to have anything to do with scissors, but it seemed every time I turned around she was pulling scissors out of my "secret" hiding spots.
I decided to embrace this advancement and take control of the situation. Education was in order. We talked about when we could use scissors, why we use scissors, what to cut, what NOT to cut, that we only sit when we cut (no walking or running) and so on. I was still apprehensive about her using regular-sized scissors so I found some craft scissors
She cut, seriously, for an hour! I had to vacuum to get up the tiny bits of paper she'd managed to cut. She went through probably only 3 pages of the magazine in that hour. She was so focused on developing that skill. I've since learned that I did a few things "wrong" in helping her use scissors. So you don't make the same mistakes I made, here are some tips I found in teaching children to use scissors:
- have your little one cut through play dough first, roll it out into a thin log (about 2 years old)
- move from play dough to card stock or manila folders
- THEN move to construction and lined paper
- move to tissue paper (about 2.5 years old)
- once your little one can cut through all of these, practice cutting along a thick line (about 3-3.5 years old)
- next practice cutting out a thick-lined circle (about 3.5-4 years old)
- finally practice cutting out a square with sharp corners (about 4.5-5 years old)
Friday, February 20, 2009
Physical Friday: Amazing Facts about Babies

Click here for the Bean Bag Giveaway!
Here is a list of 7 Things You Didn't Know About Your Baby that I read in Parents magazine December 2008. This list comes from the new book Amazing Baby by Desmond Morris
- During the nine months between conception and birth, a baby's weight increases 3,000 million times.
- Between birth and age 2, an infant will quadruple in size.
- At birth, a baby's brain is 1- percent of her total body weight (an adult's is 2 percent).
- Within 45 hours of birth, a newborn knows her own mother by smell. (And a blindfolded mom can identify her own child from a host of other babies by scent alone.)
- At birth, babies have the ability to swim.
- Human babies are the only primates to smile at their parents.
- A newborn has feet that are one third of their adult length. By age one, they are nearly half of their adult size.
Friday, February 13, 2009
Physical Friday: Bean Bag Toss Valentine Special
Sammi loves to throw things! I think it came from another episode of the Sesame Street Podcast: Basketball. She shows me how to throw the ball just like in the video. It's so fun.
In keeping with the Valentine's Day theme, since it IS tomorrow, I thought I'd introduce you to a classic game of bean bag toss, Valentine-style. I made these bags (they actually have rice, not beans) out of this cute, soft, pink fabric I found in my stash. Then I found this fun, already-decorated, very pink box and voila, instant Valentine fun!
 There are so many variations for throwing the bags into the box. You can see how far your little one can throw. Move the box (or your child) a little each time the bag goes in the box. You can see how high they can throw it and have it land in the box. Try tossing it underhand or overhand. Try standing right next to the box, hold the bag to your nose and drop it in. The box is just a target, something that motivates the action. The bag doesn't really need to land in the box every time. Help your child experiment with throwing the bean bag.
It takes a lot of fine motor skills to open your fingers to let go, especially when your arm is already moving. Children need to practice letting go just like they need to practice picking things up. Both help develop muscle control in the fingers which is essential for using utensils or writing.
Find as much pink or red as you can today to turn everyday play into Valentine's Day play! If you are not finding a lot of already-pink things, cut out some pink hearts and decorate a box or bucket so it becomes a special Valentine's Day toy.
Happy Valentine's Day!
Friday, February 6, 2009
Physical Friday: Binoculars
Today we continue this week's short series on pretend play.
 This project is fun and addresses physical development on two different levels! First, the fine motor skills needed to decorate the binoculars and second the ability to look through the binoculars to the world beyond. These binoculars are perfect for toddlers because the size just perfectly matches the distance between their eyes.
Making Binoculars
Materials Needed:

Directions:

 Once binoculars are dry (or at least mostly dry) go out and explore the world! Look through your binoculars and describe what you see. Ask your child to do the same. You can pretend you are in the jungle and describe the trees and animals you might see there. Or you can be at the zoo or in the ocean. Let the binoculars transport you to a different place or even a new world!
With very young children (less than 18 months) it's difficult for them to see through the binoculars. They get hung up on looking at the binoculars. Practice by putting your eye at one end and holding it up to their eye and talk about seeing the other eye. Gradually move away from the end and help your child to see your face. Once they "get" it, the binoculars are a new way to look at the world!
 This project is fun and addresses physical development on two different levels! First, the fine motor skills needed to decorate the binoculars and second the ability to look through the binoculars to the world beyond. These binoculars are perfect for toddlers because the size just perfectly matches the distance between their eyes.
Making Binoculars
Materials Needed:

- toilet paper rolls or paper towel rolls cut down
- decorative paper
- decorative details (pom poms, glitter, feathers, foam shapes, buttons, brads, stickers, anything you already have on hand)
- glue
- fat paintbrush
- glue dots
Directions:

- Cut the decorative paper into rectangles measuring about 4.5" by 6" (some rolls were shorter)
- Pour glue onto a plate and add a small amount of water; mix together using a fat paintbrush
- Paint glue onto backside of decorative paper; affix to roll
- Attach two rolls together using glue dots or another type of instant adhesive
- Cut strip of decorative paper about 2" by 11" (measure around both rolls to make sure strip is long enough)
- Wrap strip around both rolls and secure ends with glue or tape
- Decorate binoculars with pom poms, glitter, feathers, foam shapes, buttons, brads, stickers, or anything you already have on hand
 Once binoculars are dry (or at least mostly dry) go out and explore the world! Look through your binoculars and describe what you see. Ask your child to do the same. You can pretend you are in the jungle and describe the trees and animals you might see there. Or you can be at the zoo or in the ocean. Let the binoculars transport you to a different place or even a new world!
With very young children (less than 18 months) it's difficult for them to see through the binoculars. They get hung up on looking at the binoculars. Practice by putting your eye at one end and holding it up to their eye and talk about seeing the other eye. Gradually move away from the end and help your child to see your face. Once they "get" it, the binoculars are a new way to look at the world!
Subscribe to:
Posts (Atom)
Join Us on Facebook!


Grab Our Button!
(copy/paste into your own
website or blog):
(copy/paste into your own
website or blog):